- Using a leash
- Teaching the basic skills: sitting and staying
- Keeping your dog from bolting
- Behaving at the dinner table
One question almost every dog owner asks is, “How do I keep my dog from jumping up on people?” Dogs jump on people as a form of greeting, like saying, “Hello, nice to meet you!”
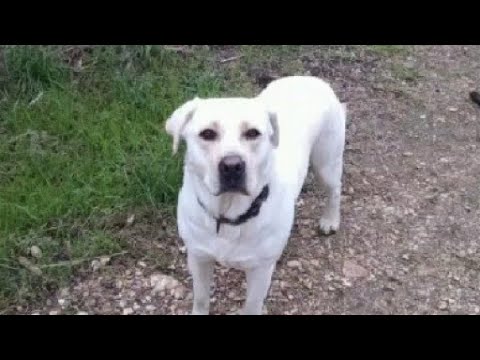
Dogs have perfected different styles of greeting behaviors. Bean, our Labrador, would literally launch himself from a distance of about six feet to greet us. Cece, our Dachshund, would jump up and scratch our legs. Neither style is acceptable.
Dogs perceive jumping on people as a friendly gesture, a dog’s way of letting the object of his affection know how happy he is to see him or her. He’s literally jumping for joy. You can train your dog to greet people in a less rambunctious fashion, but you don’t want to punish your happy pet simply because he’s glad to see you.
Even more annoying is the dog’s habit of sniffing parts of our anatomy we prefer he didn’t. Although this behavior may be normal for the dog — he uses his nose to identify the rank, gender, and age of other dogs he meets — you need to insist that he gets this information from people in a less intrusive way.
So how do you get him to stop these behaviors without dampening his enthusiasm? By teaching him to Sit and Stay on command. Your dog can’t jump on you when he’s sitting — the two behaviors are mutually exclusive.
You also need to teach Buddy a release word to let him know he can move again after you’ve told him to stay. If you don’t release him from the command after a reasonable period of time, he’ll release himself, and the length of time he stays will become shorter and shorter. Our release word is “Okay,” meaning “You can move now.” Another frequently used release word is “Free,” or “Free dog.”
The First Step: Leash Training Your Dog
The majority of dogs readily accept the leash. Some, especially puppies, need a little time to get used to it. If your dog hasn’t already been leash trained, you need to do it now.
Attach his six-foot leash to the
dead ring of his training collar (see Chapter
Equipping for Training Success), and let him drag it around. You need to supervise him so that he doesn’t get tangled up. Do this over a period of a few days. After he ignores the leash, pick up the other end and follow him around. He’ll happily wander off wherever his fancy takes him.
You’re now ready to show him where you want him to go. First, use a treat to entice him to follow you, and then gently guide him with the leash, telling him what a good puppy he is. If you’re teaching him outside, use the treat to coax him away from the house, and use the leash to guide him back toward the house. Before you know it, he’ll not only walk on the leash in your direction, but he’ll actually pull you along. See Chapter
Canine Cruise Control: Walking, Coming When Called, and Leaving Stuff Alone for teaching your dog not to pull.
Tip
Puppies are sometimes reluctant to go away from the house, even for a treat. In that case, pick up your puppy, carry him away from the house, put him down, and he’ll lead you back to the house. (Chapter Canine Cruise Control: Walking, Coming When Called, and Leaving Stuff Alone gives you even more information on leash training and more advanced techniques you can try.)
Teaching the Basics
Of all the commands your dog could learn, he must know the following to be a good house pet and socially acceptable:
- Sit
- Stay
- Okay (the release word)
- Down
- Go lie down
Sitting
The Sit and Stay is one of the simplest and yet most useful commands you can teach your dog. It gives you a wonderfully easy way to control him when you need to most. It’s also one of the most basic commands that you and your dog can quickly accomplish.
The importance of teaching a dog to sit and stay can’t be overemphasized. Not only does Buddy stop jumping up on Grandma when she walks into the house, but when the door opens, he won’t run into the street.
Remember
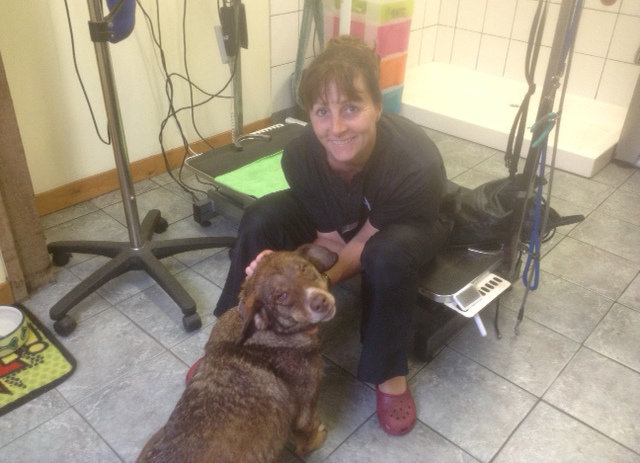
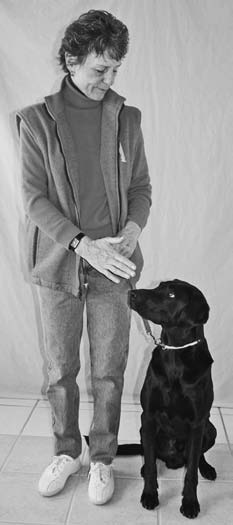
Use the “Sit and Stay” command when you want your dog to remain quietly in one spot. For example, Kaiser, a German Shepherd, would become so excited when Jane was about to feed him that he sent the dish flying out of her hands. After teaching him the Sit and Stay, he sat like a perfect gentleman when she put his dish down.
Getting your dog to sit — the easy part
Teaching your dog to sit on command is quite simple.
1. Show your dog a small, bite-sized treat, holding it just a little in front of his eyes, slightly over his head.
2. Say “Sit” as you bring your hand above his eyes.
When your dog looks up at the treat, he should sit.
3. When he sits, give him the treat and tell him what a good puppy he is.
Tell him without petting him. If you pet him at the same time as you praise him, he’ll probably get up, but what you really want him to do is sit. Praising is verbal, such as saying “good” or “good dog” in a pleasant tone of voice. Rewarding is giving the dog a treat for a correct response while he’s still in position. For example, if your dog gets up after you told him to sit, and you then give him a treat, you’re rewarding his getting up and not the Sit.
Remember
When using this method of teaching your dog to sit, position your hand properly in relation to the dog’s head. If your hand is held too high, your dog will jump up; if it’s too low, he won’t sit. Hold your hand about two inches above his head.
4. If your dog doesn’t respond on his own, say “Sit” again and physically place your dog into a Sit position by placing your left hand under his tail and behind his knees and your right hand on his chest, and then tuck him into a Sit (see Chapter Setting the Stage for Training). 5. Keep your hands still and count to five, before giving him the treat.
6. Practice making your dog sit five times in a row for five days.
Some dogs catch on to this idea so quickly that they sit in front of their owner whenever they want a treat.
Getting your dog to sit on command — the next part
When your dog understands what the word “Sit” means, you can start to teach him to obey your command.
1. Put the treat in your right hand and keep it at your side.
2. Put one or two fingers, depending on the size of your dog, of your left hand through his training collar at the top of his neck, palm facing up, and tell him to sit.
If he sits, give him a treat and tell him how good he is while taking your hand out of the collar. If he doesn’t sit, pull up on his collar and wait until he sits, and then praise and reward him with a treat.
3. Practice until he sits on command — that is, without having to pull up on or touch the collar.
4. Give him a treat and praise him for every correct response, keeping him in position to the count of five.
Remember
As your dog demonstrates that he has mastered sitting on command, start to reward the desired response every other time. Finally, reward him on a random basis — every now and then give him a treat after he sits on command. A random reward is the most powerful reinforcement of what your dog has learned. It’s based on the premise that hope springs eternal. To make the random reward work, all you have to do is use it and keep using it!
Now when Buddy wants to greet you by jumping up, tell him to sit. When he does, praise him, scratch him under the chin, and then release him. Following this simple method consistently, you can change your dog’s greeting behavior from trying to jump on you to sitting to being petted.
Staying
As a part of Buddy’s education, he has to learn the Sit-Stay in a more formal manner — not just at home, but anywhere. Because he already knows the “Sit” command, teaching the Sit-Stay should go relatively quickly.
How much time you have to spend and how many repetitions it takes for each progression depend on your dog’s Personality Profile (see Chapter
Understanding Your Dog’s Mind). How much time do you need to spend at any given session? The rule we follow is as long as we and the dog enjoy it. You can also practice several different exercises at the same session — the Sit-Stay, the Down, Walking On Leash without pulling, and the Come. Whatever you do, there’s no point advancing to the next progression until Buddy has mastered the previous one.
Here are the steps for mastering the Sit-Stay:
1. With your dog sitting at your left side, both of you facing in the same direction (called Heel position), put the rings of his training collar on top of his neck and attach the leash to the dead ring of the collar.
Remember
The Heel position is when the area from the dog’s head to his shoulder is in line with your left hip, with both of you facing in the same direction.
2. Put the loop of the leash over the thumb of your left hand and fold the leash accordion-style into your hand with the part of the leash going toward the dog coming out at the bottom of your hand.
Tip
Hold your hand as close to the dog’s collar as you comfortably can. The farther away from the dog’s collar you hold your hand, the less control you have.
3. Apply a little upward tension on the collar — just enough to let him know the tension is there, but not enough to make him uncomfortable.
4. Say “Stay” and give the “Stay” signal — a pendulum motion with the right hand, palm facing the dog, stopping in front of the dog’s nose, and then returning to your right side (check out Figure 7-1).
Figure 7-1: Giving the “Stay” signal.
Tip
Keep your body as straight as you can, and don’t bend over your dog. Before you step away from your dog, make sure your right hand is at your side again.
5. Take a step to the right, keeping the tension on the collar, count to ten, return to your dog’s side, release tension, praise him, and release your dog, taking several steps forward.
6. Repeat, only this time step directly in front of your dog, count to ten, step back to Heel position, release tension, praise, and release.
7. With your dog in Heel position, put the rings of the training collar under your dog’s chin and attach the leash to the live ring of the collar.
8. Neatly fold your leash accordion-style into your left hand, and place it against your belt buckle, allowing one foot of slack.
9. Say and signal “Stay,” and then place yourself one foot in front of your dog, keeping your left hand at your belt buckle and your right hand at your side, palm open, facing your dog.
Tip
When you see that your dog’s attention is drifting, there’s a good chance he’s about to move. You can tell your dog is thinking about moving when he starts to look around and begins to focus on something other than you. Any time you see that lack of attention, reinforce the “Stay” command by slapping the leash straight up with your right hand. Don’t say anything, but smile at your dog when he’s in position. Return your right hand to your side.
If your dog is thinking about moving or actually tries to move, take a step toward your dog with your right foot and, with your right hand, slap the leash straight up to a point directly above his head. Bring back your right foot and right hand to their original positions without repeating the “Stay” command. Count to 30 and pivot back to your dog’s right side. Count to five, praise, and release.
Until you discover how to recognize the signs that Buddy is going to move, chances are you’ll be too late in reinforcing the Stay, and he’ll have moved. When that happens, without saying anything, put him back to the spot where he was supposed to stay, stand in front of him, count to ten, return to heel position, count to five, and release him. Repeat over the course of several training sessions until your dog is steady on this exercise.
Playing the Sit-Stay game
The following steps, using the leash on the dead ring of the collar, involve testing your dog’s understanding of “Stay,” while extending the time and distance of the “Stay” command:
1. Starting in Heel position, with your left hand holding the leash and placed against your belt buckle, say and signal “Stay,” and then step three feet in front of your dog, with no tension on the leash.
2. Slightly rotate your left hand downwards, against your body, to apply tension on the leash.
This is called the Sit-Stay test. If your dog moves to come to you, reinforce the Stay with your right hand. Test three times, increasing the tension until you get physical resistance on the part of your dog.
Remember
Your tension needs to be commensurate to your dog’s size and weight. In other words, small terrier-strength tension applied to your Golden Retriever isn’t going to produce the desired results.
Tip
For the Sit-Stay test, use a downward rotation of the left wrist. Maintain tension for a few seconds, and then slowly release tension. You’re looking for physical resistance from your dog. From now on, practice this quick test before you do a Sit-Stay. Remember to release at the end of the exercise.
3. Starting in Heel position, with the leash now on the live ring, go three feet in front of your dog.
Remember
The goal is to have him stay for one minute. If he moves, reinforce the Stay.
4. Move six feet in front, to the end of the leash.
You need to practice the Sit-Stay on a fairly regular basis, but you don’t want to bore yourself or the dog. After Buddy understands what you want, once or twice a week is perfectly adequate. Start with the Sit-Stay test to refresh Buddy’s recollection of what you expect from him. When he’s reliable on leash, try him off leash in a safe place. First practice three feet in front, and then gradually increase the distance and the time you expect him to stay.
Releasing: The magic word is “Okay”
“Okay” is the release word we use. When you say the release word, your dog will know that he can move now and is on his own time. Make it a strict rule to give him the Release word, which allows him to move again, every time after you told him to stay. If you get lax about releasing and forget, Buddy will get into the habit of releasing himself. That teaches him that he can decide when to move — not a good idea and the opposite of what you want him to learn.
Remember
Buddy also needs to learn the difference between being praised for responding correctly and being released. Praise isn’t an invitation to move. You say “good boy” when Buddy responds to a command. Praise is when you use your voice, not to be confused with petting, when you use your hands. You release him when the exercise is finished.
Tip
As quickly as you can, get into the habit of using only one command. If you don’t get the desired response on the first command, show your dog what you want without repeating the command. Repeating commands teaches your dog to ignore you. By being consistent early on, your dog learns he has to respond to the first command.
Getting the dog down (but not out)
Your dog already knows how to lie down, but he needs to be taught to lie down on command. “Down” is the command used when you want your dog to lie down in place, right now, and stay there until you release him.
The following steps can help you teach this command to Buddy. If you’ve taught him the “Long Down,” he’ll quickly learn the command (see Chapter
Setting the Stage for Training).
1. With your dog sitting at your left side and a treat in your right hand, put one or two fingers of your left hand, palm facing you, through his collar at the side of his neck.
Show him the treat and lower it straight down and in front of your dog as you apply gentle downward pressure on the collar, at the same time saying “Down.”
2. When he lies down, give him the treat and praise him by telling him what a good puppy he is.
Tip
Keep your left hand in the collar and your right hand off your dog while telling him how clever he is so that he learns he’s being praised for lying down. With a small dog, you may want to do this on a table. If Buddy is reluctant to cooperate, see Chapter Setting the Stage for Training for physically placing him in the Down position.
3. Reverse the process by showing him a treat and bringing it up slightly above his head with upward pressure on the collar as you tell him to sit.
Practice having your dog lie down at your side five times in a row for five days, or until he does it on command with minimal pressure on the collar. Praise and reward with a treat every time.
4. Sit your dog at your left side and put two fingers of your left hand, palm facing you, through his collar at the side of his neck.
Keep your right hand with the treat at your right side.
5. Say “Down” and apply downward pressure on the collar.
When he lies down, praise and give him a treat every other time. Practice over the course of several days until he lies down on command without any pressure on the collar.
Tip
Make a game out of teaching your dog to lie down on command. Get him eager about a treat, and in an excited tone of voice say, “Down.” Then give him his treat. After that, when he lies down on command, you can randomly reward him.
Although the Sit-Stay is used for relatively short periods, the Down-Stay is used for correspondingly longer periods. Traditionally, the Down-Stay is also taught as a safety exercise — to get Buddy to stop wherever he is and stay there. For example, Buddy finds himself on the other side of the road. He sees you and is just about to cross the road when a car comes. You need a way to get him to stay on the other side until the car has passed by.
Remember
The object of the Down-Stay command is to have your dog respond to your command whether he is up close or at a distance. Pointing to the ground won’t work from a distance, so you need to train your dog to respond to an oral command. This is where the Down-Stay command comes in — the theory being that the dog is least likely to move in the Down position. Be that as it may, you’ll find this command not that hard to teach, and you do want to be able to stop your dog in his tracks.
Go lie down, doggy!
The “Go Lie Down” is a useful command when you want Buddy to go to a specific spot and remain there for an extended period until you release him. Use the command whenever you don’t want Buddy underfoot, such as at mealtimes or when you have visitors and don’t want him making a pest of himself.
Select the spot where you want Buddy to hang out — his crate, bed, favorite chair, whatever.
1. Depending on your needs, you can also use a movable object — a dog bed, crate pad, or blanket, which allows you to change locations.
Assume you’re going to use a dog bed.
2. Start by taking your dog to the bed and tell him “Go lie down.”
You may have to coax him with a treat.
3. When he lies down on the bed, praise, give him the treat, count to five, and release him.
4. Repeat until he readily lies down on the bed.
5. Next, start three feet from the bed, give the command “Go lie down,” and lure him onto the bed with a treat.
6. Praise him when he lies down, give him the treat, count to ten, and release him.
7. Repeat several times, gradually increasing the time between the praise and the giving of the treat, from a count of 10 to a count of 30.
Stop for now — you’re getting bored and so is Buddy — and come back to it at another time.
For your next session, review the last progression two or three times and then send Buddy from three feet. Stand still, but motion him to go to his bed. He may surprise you and actually go to his bed and lie down. If he does, praise him enthusiastically and give him a treat. If he just stands there with a befuddled look on his face, put one finger through his collar, guide him to his bed and when he lies down, praise and give him a treat. You may have to repeat this process several times until he responds to the command.
When Buddy responds reliably from three feet, gradually and over the course of several sessions, increase the distance from the bed, as well as the length of time — up to 30 minutes — you want him to stay there. If he gets up without being released, just put him back (finger through the collar).
The “Go Lie Down” command, although practical, isn’t the most exciting exercise. Use common sense, and don’t make it drudgery.
Remember
You must release him from the spot when he can move again. If you forget, he’ll get into the habit of releasing himself, thereby undermining the purpose of the exercise.
Dashing Your Dog’s Dashing Habits
Warning!
Almost as annoying as unrestrained greeting behavior, but far more dangerous, is the dog’s habit of dashing through doors just because they’re open, racing up and down stairs — ahead, or behind you — and jumping in and out of the car without permission. These behaviors are dangerous to your dog because he may find himself in the middle of the road and get run over. These behaviors are dangerous to you because you may get knocked over or down the stairs.
Prevent such potential accidents by teaching Buddy to sit and stay while you open the door and to wait until you tell him it’s okay to go out.
Door and stair manners
After your dog knows the Sit-Stay, you can easily teach him door manners:
1. Put your dog on leash, using the dead ring of the training collar, and review the Sit-Stay test described in “Teaching the Basics,” earlier in the chapter.
2. Neatly fold the leash, accordion-style, into your left hand, and approach the closed door you normally use to let him out.
Follow the same procedure as you did for Sequence 1 of the Sit-Stay. Place yourself in such a way that you can open the door without your dog having to get out of its way.
3. With a little upward tension on the collar, tell Buddy to stay, and open the door.
Release the tension, and he should stay. If he doesn’t, apply a little upward tension. Close the door and try again.
4. When Buddy stays without any tension on the leash facing the open door, slowly walk through the door.
If he tries to follow, apply upward tension on the leash to remind him to stay. Repeat until he stays without having to be reminded.
5. Walk through the door and release him so he can follow you.
6. Repeat the entire sequence off leash, beginning with step 1.
You’ll find that after several repetitions, he begins to get the message and will sit and stay on his own as you approach the door.
Remember
Motion means more to dogs than words, so make sure you stand still when releasing your dog. For this exercise, you don’t want him to associate your moving with the release. Dogs are also time conscious, so vary the length of time you make him wait before releasing him.
Some people prefer to go through the doorway first, while others want the dog to go through first. It makes no difference, so long as your dog stays until you release him. Practice through doors your dog uses regularly, including the car door, especially exiting the car. Every time you make him sit and stay, you reinforce your position as pack leader and the one in charge.
Tip
If you have stairs, start teaching Buddy to stay at the bottom while you go up. First sit him and tell him to stay. When he tries to follow, put him back and start again. Practice until you can go all the way up the stairs with him waiting at the bottom before you release him to follow. Repeat the same procedure for going down the stairs.
After Buddy has been trained to wait at one end of the stairs, you’ll discover that he’ll anticipate the release. He’ll jump the gun and get up just as you’re thinking about releasing him. Before long, he’ll only stay briefly and release himself when he chooses. It may happen almost as soon as he grasps the idea, or it may take a few weeks or even months, but it will happen.
When it does, stop whatever you’re doing and put him back, use the stairs, turn, count to ten, and release him. Don’t let him get into the habit of releasing himself. Consistency is just as important here as it is teaching any other exercise.
The doorbell and guests
Buddy now knows to sit and stay when you open the door. It’s doubtful, however, that he’ll obey these commands when the doorbell rings or someone knocks on the door. If your dog is anything like ours, the doorbell causes an immediate charge amidst paroxysms of barking. Even though most people want their dog to display his protective side, they then also want him to stop, sit, and stay, so they can answer the door.
To accomplish this goal, you need to enlist the aid of a friend or neighbor to ring the doorbell.
1. Agree on a time and then put Buddy on leash.
When the bell rings and your dog goes through his antics, tell him to “Sit and Stay.”
Tip
To help make your helper’s arrival as traditional as possible, have him or her ring the doorbell only once. Ask him or her to wait for you to open the door.
2. Start to open the door and when he gets up, which he surely will, reinforce the Sit-Stay with a check.
If Buddy is an excitable soul, you may have to put him on the live ring of his training collar before he takes you seriously. Less excitable dogs catch on after two or three attempts.
3. When Buddy stays, open the door and admit your accomplice.
At this point, Buddy will more than likely want to say hello. Again, reinforce the Stay, and have your helper approach him holding out the palm of his or her hand.
4. Let Buddy sniff the palm, and then have your helper ignore him.
You may have to be right next to Buddy to reinforce the Sit-Stay.
5. You need to repeat this procedure several times until Buddy is reliable and holds the Sit-Stay while you open the door.
Remember to release him. Successful training depends on who is more determined and persistent — you or your dog.
The procedure to teach Buddy not to jump on people is the same. Follow the same progressions as you did for the doorbell, and when Buddy wants to jump on your helper, reinforce the “Stay” command with a check. After several repetitions, Buddy should be steady enough to try him off leash. The key to your ability to control Buddy is a reliable Sit-Stay.
Having said that, you also need to remind your guests not to get Buddy all riled up with vigorous petting or active solicitations to play. The less excitement, the better. The proper way to greet a dog on a Sit-Stay is to let him sniff the palm of the hand and perhaps a little scratch under the chin. A dog doesn’t like to have the top of his head patted anymore than kids do.
Tip
Paying attention to inflectionGive commands in a normal tone of voice. For example, when giving the “Sit” command, remember that it’s “Sit!” — the command — and not “Sit?” — the question. When releasing, say the release word in a more excited tone of voice, as in “That’s it, you’re all done!” Unless impaired, a dog’s sense of hearing is extremely acute, and when giving a command, there’s absolutely no need to shout. In fact, the opposite is true — the more quietly you give your commands, the quicker your dog learns to pay attention to you. |
Remember
When teaching a new command, you may have to repeat it several times during the initial introduction before your dog catches on. After the first session, teach him to respond to the first command. Give the command, and if nothing happens, show your dog exactly what you want by physically helping him. Consistency is the key to success.
Setting the Tone for Proper Table Manners
Teaching Buddy table manners is your responsibility, and you only have to remember one rule: Don’t feed the dog from the table. This concept sounds a lot simpler than it is, especially in a multiperson household. Moreover, don’t ever underestimate your dog’s ability to train you.
Remember
Every time you reward your dog’s efforts with a treat from the table, you’re systematically teaching him not to take “no” for an answer.
When Buddy was a puppy, nobody thought much about occasionally slipping him something from the table. But now he is 6 months old, almost fully grown, and has started to beg at the table. Because his begging is no longer cute and is embarrassing when you have guests, the family resolves to put a stop to it.
At first, Buddy doesn’t believe you’re serious; after all, you were the one who started it in the first place. He digs a little deeper into his repertoire of begging routines. He may sit up, nudge you, paw you, or whine in the most pathetic tone as though he’s near death’s door from starvation. Sure enough, little Sally takes pity on him and slips him something.
As this scenario repeats itself, often with longer intervals before someone gives in, Buddy is systematically being trained to persevere at all cost and never give up. Looking at it from his point of view, you’re rewarding, even encouraging, the very behavior you want to stop.
When you stop rewarding the undesired behavior (begging), your dog will stop begging at the table. As soon as you stop giving in to Buddy, his efforts will decrease, until over time, and provided you don’t have a relapse, he’ll stop begging altogether. In technical jargon, you have extinguished the undesired behavior by refusing to reward it.
You can also save yourself all this aggravation by teaching Buddy the “Go Lie Down” command so you can enjoy your meals in peace. (See “Go lie down, doggy!” earlier in this chapter.)
by Jack and Wendy Volhard


 Best in Show: Showing Your Dog
 The Ins and Outs of Agility Training
 Teaching Your Dog Tricks
 Basic Training and Beyond
 Teaching Your Dog Manners
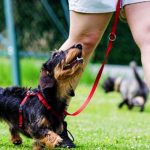 Housetraining 101
 Ten Ways to Ensure Fido’s Fit for Tricks and Agility
 Top Ten Sports Injuries for Dogs
 Nearly Ten Agility Moves Anyone Can Try
 Harness Sports: Bringing Pulling Dogs to the Starting Line
 Participating in More Hobbies and Breed-Specific Events
 Sharing Favorite Sports and Backyard Games
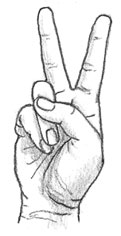 Competing in Agility: Ready, Set, Go!
 Sequencing and Troubleshooting Your Agility Moves
 Teaching the A-Frame, Dog Walk, Teeter, and Weave Poles
 Introducing Your Dog to Jumps, Tunnels, and Tables
 Laying the Foundations for Agility
 Considering Agility Training
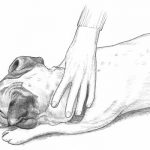 Adding Drama with Clever Tricks
 Barking, Counting, and Singing on Cue
 Jumping and Dancing for Joy